

I showed you this Christmas wreath that I made a couple of weeks ago and from the response that it has had, I have made a tutorial for you to make your own at home.
Je vous ai montré cette couronne de Noël que j'ai fait un il y a quelques semaines et à partir de la réponse qu'elle a eu, j'ai fait un tutoriel pour vous de faire la vôtre chez vous.

You will need
1 30cm polystyrene flat backed circle
6 sheets of 12 x 12 Designer Series Paper (Be of Good Cheer)
2 8 x 12 Designer Series Paper (I've used Gumball Green and Cherry Cobbler)
2 x 80cm Cherry Cobbler Tulle Ribbon
Bone Folder
Paper Trimmer
Pins
Glue Gun
Vous aurez besoin de
1 30cm polystyrène cercle plat
6 feuilles de 30 x 30 Papier de la série Design (Etoile des Neiges)
2 8 x 30 Papier de la série Design (j'ai utilisé Fil de Chrolophylle et cerise Carmin)
2 x 80cm cerise Carmin en tulle ruban
Plioir en os
massicot
épingles
pistolet à colle
1 30cm polystyrène cercle plat
6 feuilles de 30 x 30 Papier de la série Design (Etoile des Neiges)
2 8 x 30 Papier de la série Design (j'ai utilisé Fil de Chrolophylle et cerise Carmin)
2 x 80cm cerise Carmin en tulle ruban
Plioir en os
massicot
épingles
pistolet à colle

Start by cutting the 12 x 12 paper into 1.5cm strips
& the 8 x 12 paper into 1 inch by 4 inch strips (2.5cm x 10cm).
Commencez par couper le papier 30 x 30 en bandes de 1,5 cm
et le papier 8 x 12 cm en bandes de 2,5 x 10cm.


Then, using the bone folder, curl your 1.5 x 30cm papers.
Puis, en utilisant le plioir, détendez vos papiers de 1.5 x 30cm.


You will end up with a huge pile like this on.
Vous allez vous retrouver avec un énorme tas comme celui-ci.

I just bend the end of the 2.5 x 10cm pieces to make sticking the ends easier.
Je courbe que les extrémités des bandes de 2,5 x 10 cm pour faire coller les extrémités plus facile.
Heat your glue gun and stick down the backing strips like this.
Overlap them so no white of the circle is showing on the back.
Faites chauffer votre pistolet à colle et coller les bandes support comme celui-ci.
Les faire se chevaucher donc aucun blanc du cercle s'affiche sur le dos.
Les faire se chevaucher donc aucun blanc du cercle s'affiche sur le dos.


You then need to stick down the inside and outside flaps of papers.
Vous devez ensuite coller les rabats à l'intérieur et à l'extérieur de papiers.


Now it is time to start gluing the paper curls to the wreath - I also use a pin here, although the glue does dry quite quickly.
Maintenant, il est temps de commencer à coller les boucles de papier à la couronne - J'ai aussi utiliser une épingle ici, bien que la colle ne sèche très rapidement.


It will take a while, but build up slow from one side and continue working round the circle making sure to cover most of the white circle.
Il faudra un certain temps, mais construire lentement d'un côté et de continuer à travailler le tour du cercle en prenant soin de couvrir la majeure partie du cercle blanc.


Once all the paper curls have been added your wreath will look like this.
Une fois que toutes les boucles de papier ont été ajoutées votre couronne ressemblera à ceci

Next add a tulle ribbon bow using on of the 80 cm pieces. The other piece is to use for hanging and that is glued to the back.
Ensuite, ajoutez un noeud de ruban tulle utilisant un des 80 morceaux cm. L'autre pièce est à utiliser pour suspendre et est collée à au dos.
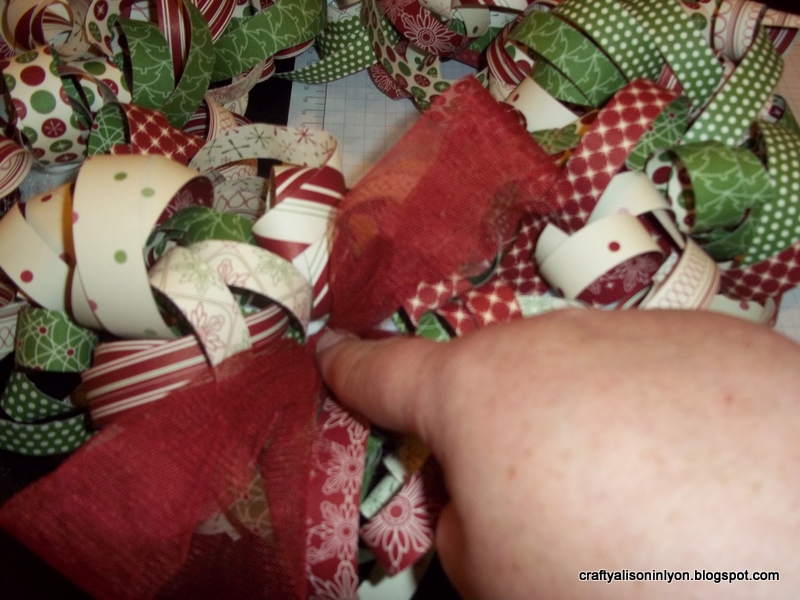
Finally, the best way I can describe it is by saying - you know when you come out of the hairdressers' after getting a perm, you need to poke and play with your curls until you are happy with the way they are sitting.
Enfin, la meilleure façon de le décrire est de dire - vous savez quand vous sortez de la «coiffeurs après avoir obtenu une permanente, vous avez besoin pour pousser et jouer avec vos boucles jusqu'à ce que vous êtes satisfait de la façon dont ils sont assis.

I hope that you like this tutorial and I would ask if you do use it that you link back to my blog, thank you.
J'espère que vous aimez ce tutoriel et je voudrais vous demander si vous l'utilisez que vous faire un lien vers mon blog, je vous remercie.
Alison xx


